Construction
Construction of Project F1/10th utilized many different processes including the CNC machine, Bridgeport, band saw, partner, lathe, water jet cutting, and more. Before construction began, Max had a plan for how ever part would be manufactured. As construction began Max followed these plans and only added more processes to improve the manufacturing of parts. Some parts required more processes than Max had planned and are described below.

I Beam Construction
The I beams were constructed by starting out by selecting a block of material that was closest to the final dimensions of the part. the block was then cut into more relative dimentions of the part with room to spare on all sides. The blocks were placed in the partner and made flat to the highest dimension on the part laying flat. After the CNC was used to cut the slot out of the middle and cut down the shorter side of the beams. The blocks were rough trimmed with the band saw and then put back into the CNC to cut the periphery.

Front Suspension
The team had been waiting for this moment, putting the front wheels and tires on the truck. Mad had completed the I-beams, front subframe, and upper shock mount allowing the wheels to be mounted. The subframe was made using a 3D printer and was made of PLA plastic. the shock tower was waterjet cut and bent by an outsourced manufacturing company. lastly, the spindles and shocks were purchased parts that Max decided it wouldn't be in the budget to attempt creating those parts.

Rear Trailing arms
The rear trailing arms were made out of 6160 machined aluminum. Max chose to make the arms entirely on the Bridgeport. These two parts were identical side to side. Due to the design of the part, a total of eight operations were done to complete the part. This was a great opportunity for max to spend more time on the Bridgeport.

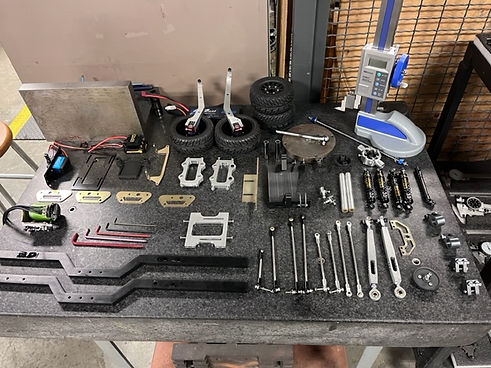
Part layout
Max and Nate completed all parts on time in accordance with the schedule. The team laid out, inspected, and checked off all their parts. It was very exiting to see all the parts completed knowing all the hard work put into them. This allows the top assembly to be constructed so testing could begin.
Final assembly
Once all the parts were created, the team assembled the entire truck. The purchased body was placed on top of the car to check fitment. One of the team's requirements was to design the vehicle to fit the body without trimming. Though it doesn't have any mounts yet, the body seemed to fit the chassis perfectly.


